Introduction
Concrete pavers are one of the most popular choices for patios, walkways, driveways, and pool decks because they combine durability, style, and flexibility. Unlike poured concrete, pavers are installed as individual units, which makes them easier to repair and better able to handle shifting ground. With the right preparation and installation process, concrete pavers can create a beautiful surface that lasts for many years.
Why Choose Concrete Pavers?
Homeowners often choose concrete pavers because they offer a strong balance of performance and appearance. They come in many shapes, colors, and textures, making it easy to match the style of a home or landscape. They also provide excellent traction, which is especially useful in wet areas such as pool decks and garden paths.
Another major advantage is flexibility. Since pavers are set on a compacted base with joint sand between them, they can adapt to minor ground movement without cracking like a solid slab might. If a section becomes damaged, individual pavers can be removed and replaced instead of tearing out an entire surface.
Planning Your Project
Measure the Area
Start by measuring the space where the pavers will be installed. This helps you calculate how many materials you need, including pavers, base gravel, bedding sand, and edge restraints. It is wise to order extra pavers to account for cuts, breakage, and future repairs.
Choose the Right Paver Style
Concrete pavers come in many designs, from classic rectangular shapes to modern large-format styles. Consider the function of the space when choosing a product. Driveways need thicker pavers and a stronger base than a patio or walkway. Also think about the color and finish, since lighter tones may show less heat in sunny areas while textured finishes can improve slip resistance.
Check Drainage and Layout
Good drainage is essential for any paver project. Water should flow away from buildings and not collect beneath the surface. Plan the layout carefully so the finished surface has the right slope, usually about a quarter inch per foot, to guide water away from structures. Mark the project area with stakes and string lines before any digging begins.
Tools and Materials You’ll Need
Having the right tools makes the installation process smoother and more accurate. Common tools include a tape measure, shovel, rake, plate compactor, level, rubber mallet, masonry saw or paver splitter, and a broom. Materials typically include excavated soil removal, crushed stone base material, bedding sand, concrete pavers, edging, and joint sand.
If you are installing a larger area, renting a plate compactor and a cutting tool can save significant time. Safety gear such as gloves, eye protection, and sturdy footwear is also important.
Step-by-Step Concrete Pavers Installation
1. Excavate the Area
Begin by removing grass, soil, roots, and any loose material from the installation zone. The depth of excavation depends on the project type, but it must allow room for the pavers, sand bedding, and base layer. Driveways require more excavation than patios because they must support heavier loads.
2. Build a Solid Base
The base is the foundation of the entire project. Spread crushed stone or gravel in layers and compact each layer thoroughly. A stable base prevents settling and helps the pavers stay level over time. Skipping this step or compacting poorly is one of the most common reasons paver surfaces fail.
3. Add Bedding Sand
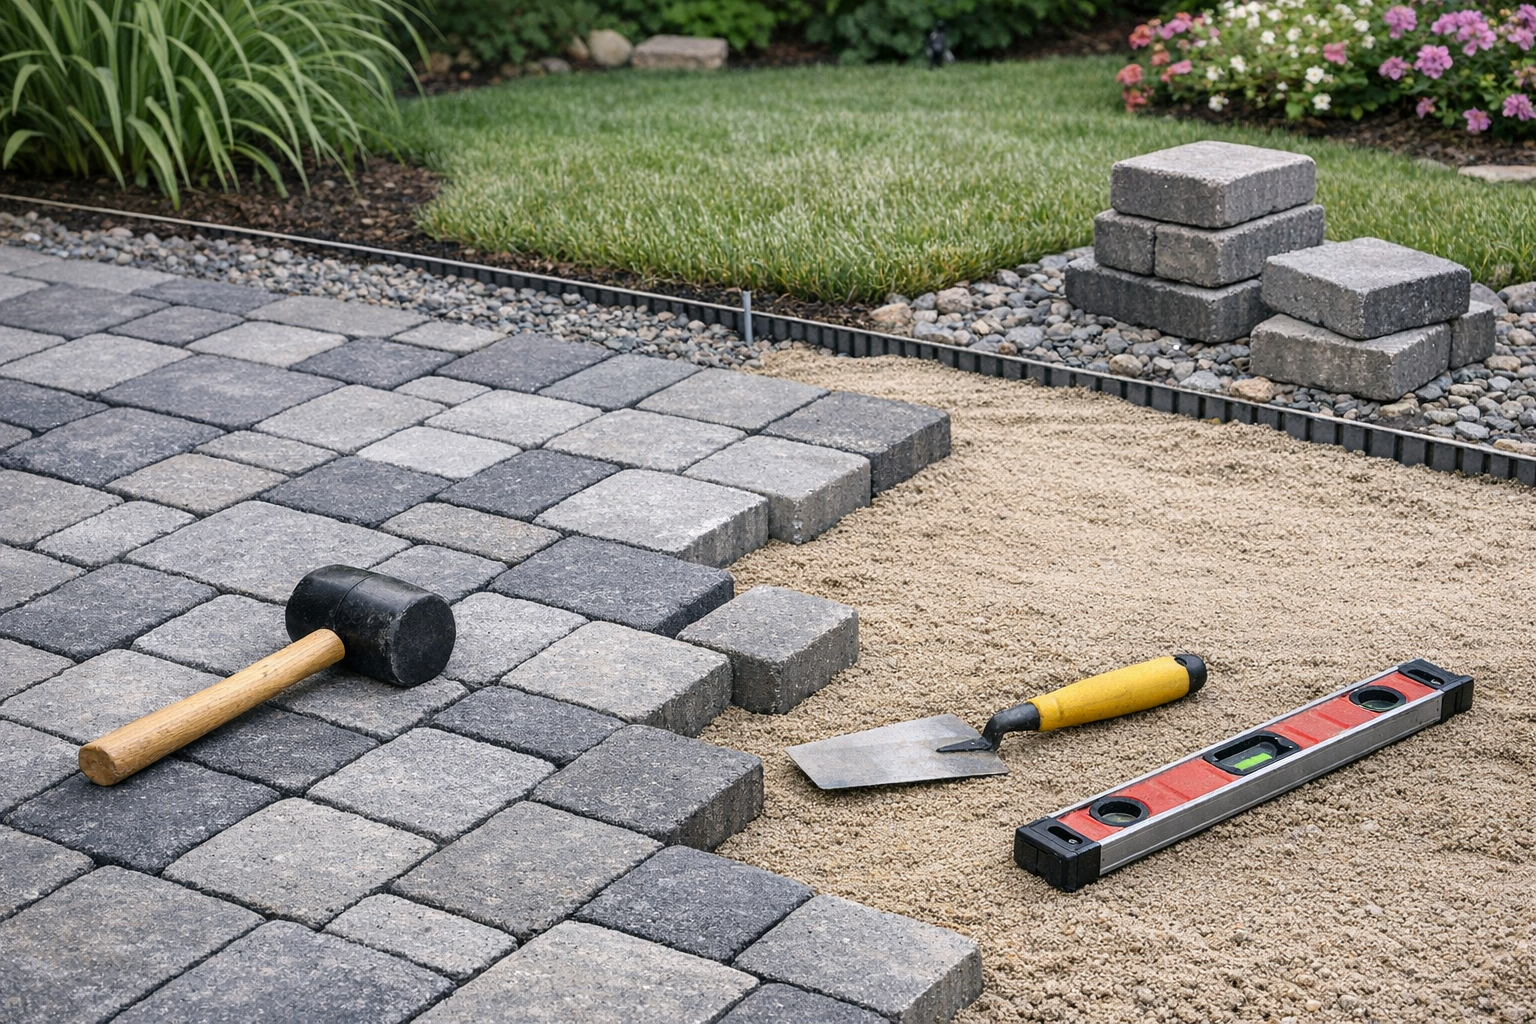
Once the base is compacted and graded, spread a thin layer of bedding sand over the surface. This layer should be smooth and even, but not compacted before the pavers are placed. Use screed rails or pipes to help create a consistent thickness. The sand layer helps set the pavers evenly and provides a stable bed for installation.
4. Lay the Pavers
Begin laying concrete pavers from a straight edge, such as a wall or border. Place each paver carefully and keep the joints tight and consistent. Work from multiple boxes at once to blend color variations naturally across the surface. Use a rubber mallet to gently tap pavers into place if needed, but avoid forcing them too deeply into the sand.
5. Cut Border Pieces as Needed
Most projects require paver cuts around edges, curves, or obstacles. Measure carefully and use a masonry saw or paver splitter for clean cuts. Accurate trimming gives the finished project a professional look and helps the surface fit tightly against the edge restraints.
6. Install Edge Restraints
Edge restraints keep the pavers from spreading outward over time. They are typically installed along the perimeter and secured with spikes. Without solid edging, even a well-built paver surface can gradually lose its shape.
7. Fill the Joints
After the pavers are in place, sweep dry joint sand over the surface so it settles into the gaps between units. Compact the pavers again to help lock them together, then add more sand as needed. This joint sand plays an important role in stabilizing the surface and helping distribute loads.
8. Final Cleanup and Inspection
Once the joints are filled, sweep away excess sand and inspect the surface for uneven areas. Check the edges, slopes, and alignment to ensure everything is secure and properly finished. If desired, a paver sealer can be applied later to enhance color and help protect against stains.
Common Mistakes to Avoid
One of the biggest mistakes in concrete pavers installation is inadequate base preparation. A weak or uneven base can lead to sinking, wobbling, and surface distortion. Another common issue is poor drainage, which may cause water pooling and long-term damage.
It is also important not to rush the leveling process. Even small variations can become noticeable once the project is complete. Finally, using the wrong type of joint sand or failing to compact the surface properly can reduce the stability of the installation.
Maintenance Tips for Long-Term Performance
Concrete pavers are relatively low maintenance, but regular care will help them look and perform their best. Sweep the surface periodically to remove dirt and debris. Rinse it as needed to prevent buildup, and refill joint sand when it starts to wash out. If weeds appear between joints, remove them promptly before they spread.
For added protection, consider sealing the pavers every few years, especially in high-traffic or stain-prone areas. A well-maintained paver surface can stay attractive and functional for decades.
Conclusion
Concrete pavers installation is a rewarding project that adds beauty, value, and durability to outdoor spaces. With careful planning, a properly compacted base, and attention to detail, you can create a surface that stands up to daily use while enhancing your landscape. Whether you are building a patio, walkway, or driveway, following the right installation steps is the key to lasting results.